Embarking on a flooring upgrade can be both an exciting and potentially overwhelming endeavor for homeowners. From selecting the ideal flooring material to understanding the necessary preparations and the installation process itself, knowing what to expect at each phase is crucial for ensuring a smooth, stress-free experience.
In this step-by-step guide, we will demystify the process of installing new floors in your home, regardless of the chosen flooring type. We'll delve into the essential phases of the project, outline the key considerations homeowners need to address, and provide expert tips to help you navigate the flooring installation journey with confidence.
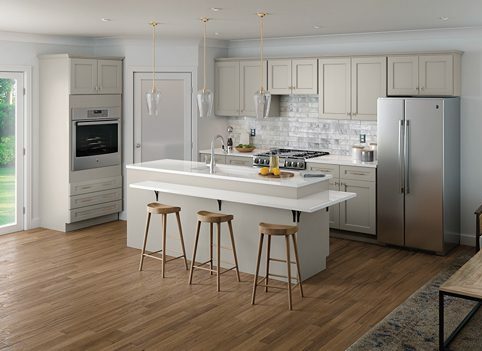
With Top Knot's comprehensive guide to flooring installation, you'll be fully prepared to transform your living space and enhance your home's visual appeal, comfort, and value.
1. Assess Your Home and Choose the Right Flooring
Before diving into the installation process, it's essential to carefully evaluate your home's specific needs and identify the ideal flooring type for your lifestyle, budget, and aesthetic preferences. Consider factors such as room usage, moisture levels, and existing décor when selecting a flooring material. Common flooring options include:
- Hardwood: A classic and durable choice, hardwood offers timeless appeal and can potentially increase your home's value. However, it may not be suitable for areas with high moisture, such as bathrooms or basements.
- Laminate: An affordable and versatile option, laminate flooring is low maintenance and can replicate the appearance of hardwood, tile, or stone. It’s a practical choice but may be less durable than other options.
- Vinyl: This cost-effective and water-resistant material is suitable for high-traffic and moisture-prone areas, offering various designs and easy installation.
- Tile: Known for its resilience and waterproof properties, tile flooring is ideal for bathrooms, kitchens, and entryways, offering numerous design possibilities.
2. Proper Measurements and Material Estimates
Once you've chosen the right flooring for your home, the next step is to accurately measure the space and determine the amount of material required. Remember to account for waste and extra coverage depending on the installation method. Here's how to carry out the measuring process:
Sketch out the floor plan, indicating any irregularly shaped areas, doorways, and fixtures.
- Break down complex room shapes into smaller, easy-to-measure rectangles or squares.
- Calculate the area of each section — length x width — and sum up the numbers to find the total square footage required.
- Add an additional five to 10% for waste and extra coverage, depending on the flooring type and installation method.
- Be sure to consult a professional or use an online flooring calculator if you're unsure of your measurements.
3. Preparing Your Home and Subfloor
Before beginning the flooring installation, it's essential to prepare your home and subfloor adequately to ensure a smooth process and a professional result. The following steps and considerations will help guide your preparation:
- Remove furniture, appliances, and all items from the room.
- Carefully take out the baseboards and any existing flooring or carpeting.
- Inspect the subfloor for any damage, such as cracks, unevenness, or moisture issues. Repair or replace damaged areas as needed.
- Ensure the subfloor is clean and debris-free, sweeping or vacuuming any dust or particles.
- If necessary, install a suitable underlayment based on the chosen flooring type. This may include moisture barriers for moisture-prone areas and sound dampening underlay for second-story rooms or laminate flooring.
- Be mindful of temperature and humidity levels, as these can affect the flooring's expansion, contraction, and overall performance. Follow the manufacturer's guidelines for optimal conditions during installation.
4. Installing Your New Flooring
With your home and subfloor ready, it's time to move on to the actual installation. The process will vary based on the flooring type, and it's crucial to follow the manufacturer's instructions for the best results. Below is a general overview of what you can expect:
- Hardwood: Installation methods include nailing, gluing, or floating, depending on the product. Remember to leave an expansion gap of at least 1/4 inch around the room's perimeter. Stagger the board seams and use spacers to maintain consistent spacing. Cut the boards as necessary to fit around doorways or fixtures.
- Laminate: Laminate flooring utilizes a floating installation method, clicked together and laid over an underlayment without being nailed or glued to the subfloor. Like hardwood, leave an expansion gap around the perimeter and use spacers to ensure even board placement.
- Vinyl: Depending on the product, vinyl flooring installation methods include full-spread adhesive, perimeter adhesive, or floating. Ensure all seams are tightly butted, and use a floor roller to press the material in place, eliminate air bubbles, and ensure proper adhesion.
- Tile: Begin by applying thin-set mortar to a small area of the subfloor with a notched trowel. Lay the tiles in the desired pattern, using spacers to maintain a consistent gap between them. Allow the mortar to dry completely before applying grout to the joints.
5. Finishing Touches
Once your new flooring has been installed, there are a few final steps to complete the project:
- Reinstall baseboards or install new ones to cover the expansion gaps around the room's perimeter.
- Trim and reattach door casings or install transition strips for seamless transitions between rooms and floors.
- Clean the area thoroughly to remove any dust, debris, or excess adhesive left behind during installation.
Transform Your Home with Expert Flooring Installation Services
Now that you've gained valuable insights into the flooring installation process, you can confidently embark on this exciting journey to transform and enhance your home. While DIY installation may appeal to some homeowners, it's essential to recognize the expertise and experience that trained professionals bring to the table.
At Top Knot, we are dedicated to delivering top-notch, seamless flooring choices that meet your unique needs and exceed your expectations. Our team of skilled professionals is ready to guide and assist you through each stage of the installation process, from selecting the perfect materials to answering questions and providing expert advice.
Don't hesitate to contact Top Knot for all your flooring installation needs. With our team by your side, you'll enjoy a stress-free, rewarding experience that culminates in a stunning new floor designed specifically for your beloved home.